> ## Documentation Index
> Fetch the complete documentation index at: https://specterops-bp-2735-release-notes.mintlify.site/llms.txt
> Use this file to discover all available pages before exploring further.
# Integrate BloodHound Enterprise in Google SecOps
> Learn how to install and configure the BloodHound Enterprise integration and connector in Google SecOps.
 The BloodHound Enterprise integration for Google SecOps lets you ingest Attack Path findings into Google SecOps so analysts can investigate and respond without leaving the platform. This guide shows you how to install the integration from the Google Marketplace, configure the integration instance, and enable the connector that creates cases, alerts, and events.
Use this integration to:
* Create Google SecOps cases from BloodHound Enterprise Attack Path findings
* Investigate findings with BloodHound Enterprise asset lookup and path validation actions
* Group related alerts by source domain to keep investigations organized
## Prerequisites
Before you begin, ensure that you have the following:
* A Google SecOps tenant
* A BloodHound Enterprise tenant
* A BloodHound Enterprise [non-personal API key/ID pair](/integrations/bloodhound-api/working-with-api#create-a-non-personal-api-key%2Fid-pair) with the **Auditor** role
## Install and configure the integration
Install the integration instance in Google SecOps and connect it to your BloodHound Enterprise tenant.
1. Log in to your Google SecOps tenant with an account that has permission to install integrations.
2. Go to **Content Hub** > **Response Integrations**.
3. Search for `BloodHound Enterprise - Google SecOps`.
4. Click **Install**.
5. Click **Configure**.
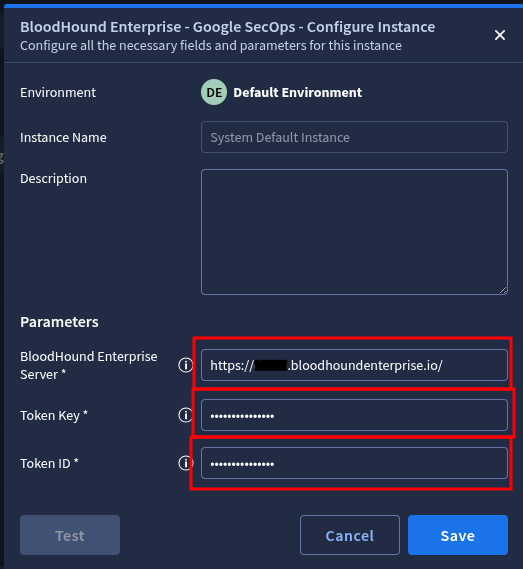
Configure the required fields for the integration instance:
| Field | Description |
| -------------------------------- | ----------------------------------------------------- |
| **BloodHound Enterprise Server** | The URL of your BloodHound Enterprise tenant |
| **Token ID** | The API token ID used to authenticate requests |
| **Token Key** | The API token key used to sign and authorize requests |
Save the configuration after you enter the required values.
The BloodHound Enterprise integration for Google SecOps lets you ingest Attack Path findings into Google SecOps so analysts can investigate and respond without leaving the platform. This guide shows you how to install the integration from the Google Marketplace, configure the integration instance, and enable the connector that creates cases, alerts, and events.
Use this integration to:
* Create Google SecOps cases from BloodHound Enterprise Attack Path findings
* Investigate findings with BloodHound Enterprise asset lookup and path validation actions
* Group related alerts by source domain to keep investigations organized
## Prerequisites
Before you begin, ensure that you have the following:
* A Google SecOps tenant
* A BloodHound Enterprise tenant
* A BloodHound Enterprise [non-personal API key/ID pair](/integrations/bloodhound-api/working-with-api#create-a-non-personal-api-key%2Fid-pair) with the **Auditor** role
## Install and configure the integration
Install the integration instance in Google SecOps and connect it to your BloodHound Enterprise tenant.
1. Log in to your Google SecOps tenant with an account that has permission to install integrations.
2. Go to **Content Hub** > **Response Integrations**.
3. Search for `BloodHound Enterprise - Google SecOps`.
4. Click **Install**.
5. Click **Configure**.
Configure the required fields for the integration instance:
| Field | Description |
| -------------------------------- | ----------------------------------------------------- |
| **BloodHound Enterprise Server** | The URL of your BloodHound Enterprise tenant |
| **Token ID** | The API token ID used to authenticate requests |
| **Token Key** | The API token key used to sign and authorize requests |
Save the configuration after you enter the required values.
 1. Click **Test** to validate the server URL and API credentials.
2. Confirm that the test succeeds before you continue.
1. Click **Test** to validate the server URL and API credentials.
2. Confirm that the test succeeds before you continue.
 A successful test confirms that Google SecOps can connect to the BloodHound Enterprise API with the supplied credentials.
If the test fails, review the error message and confirm that the server URL, token ID, and token key are correct. You can also refer to the [troubleshooting guide](/integrations/google-secops/troubleshoot) for more help diagnosing common issues.
## Configure the connector
The connector retrieves Attack Path findings from BloodHound Enterprise and creates the corresponding cases, alerts, and events in Google SecOps.
You can manually trigger the connector to run a one-time ingestion of BloodHound Enterprise findings, or you can enable it to run on a schedule.
1. Go to **Settings** > **SOAR Settings** > **Ingestion** > **Connector**.
2. Click **Create New Connector**.
3. Select the BloodHound Enterprise connector that you want to configure.
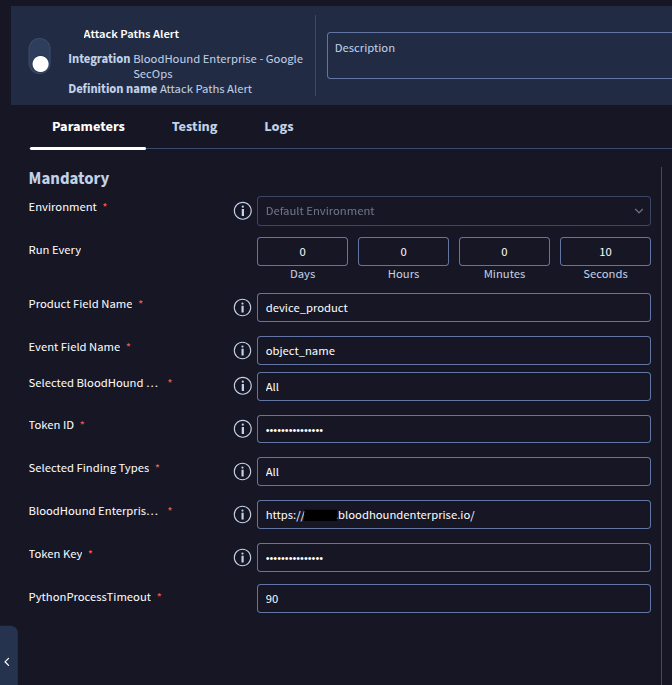
1. Open the **Parameter** tab.
2. Enter the required values for the connector.
| Field | Description |
| ------------------------------------ | ------------------------------------------------------------------------- |
| **BloodHound Enterprise Server** | The URL of your BloodHound Enterprise tenant |
| **Token ID** | The API token ID used for authentication |
| **Token Key** | The API token key used to sign requests |
| **Selected BloodHound Environments** | The BloodHound Enterprise environments that the connector should query |
| **Selected Finding Types** | The Attack Path finding categories that the connector should ingest |
| **Run Every** | The interval at which the connector polls BloodHound Enterprise |
| **Product Field Name** | The source field name that Google SecOps should use for the product value |
| **Event Field Name** | The source field name that Google SecOps should use for the event value |
A successful test confirms that Google SecOps can connect to the BloodHound Enterprise API with the supplied credentials.
If the test fails, review the error message and confirm that the server URL, token ID, and token key are correct. You can also refer to the [troubleshooting guide](/integrations/google-secops/troubleshoot) for more help diagnosing common issues.
## Configure the connector
The connector retrieves Attack Path findings from BloodHound Enterprise and creates the corresponding cases, alerts, and events in Google SecOps.
You can manually trigger the connector to run a one-time ingestion of BloodHound Enterprise findings, or you can enable it to run on a schedule.
1. Go to **Settings** > **SOAR Settings** > **Ingestion** > **Connector**.
2. Click **Create New Connector**.
3. Select the BloodHound Enterprise connector that you want to configure.
1. Open the **Parameter** tab.
2. Enter the required values for the connector.
| Field | Description |
| ------------------------------------ | ------------------------------------------------------------------------- |
| **BloodHound Enterprise Server** | The URL of your BloodHound Enterprise tenant |
| **Token ID** | The API token ID used for authentication |
| **Token Key** | The API token key used to sign requests |
| **Selected BloodHound Environments** | The BloodHound Enterprise environments that the connector should query |
| **Selected Finding Types** | The Attack Path finding categories that the connector should ingest |
| **Run Every** | The interval at which the connector polls BloodHound Enterprise |
| **Product Field Name** | The source field name that Google SecOps should use for the product value |
| **Event Field Name** | The source field name that Google SecOps should use for the event value |
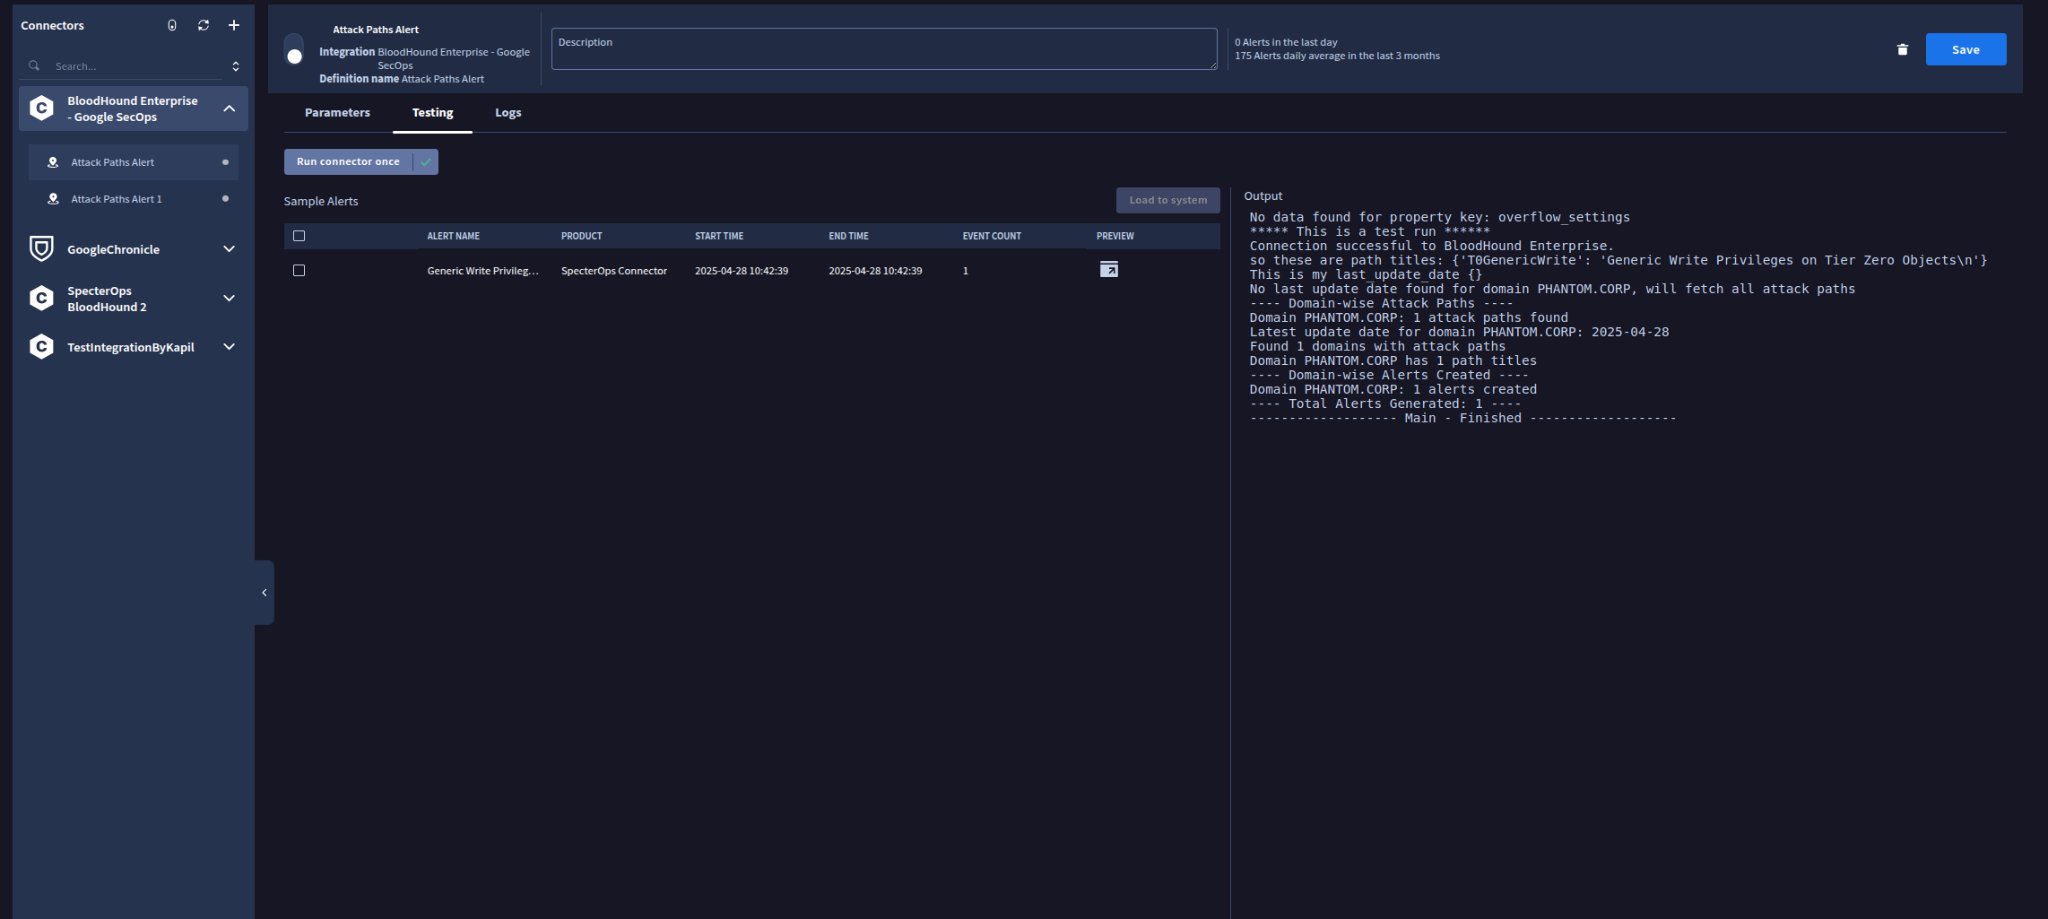
 The connector test validates connectivity, connector logic, and the required parameter values without requiring you to enable the connector first.
1. Open the **Testing** tab.
2. Click **Test Connector** to run a one-time execution.
3. Review the generated alerts and the debug logs.
4. Click **Log to System** if you want to create cases from the generated test alerts.
The connector test validates connectivity, connector logic, and the required parameter values without requiring you to enable the connector first.
1. Open the **Testing** tab.
2. Click **Test Connector** to run a one-time execution.
3. Review the generated alerts and the debug logs.
4. Click **Log to System** if you want to create cases from the generated test alerts.
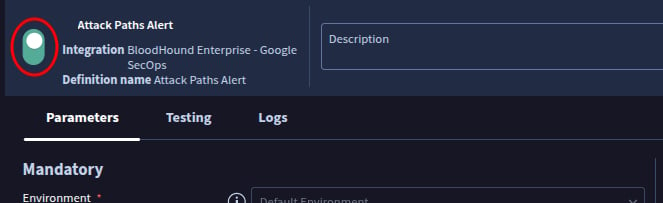
 1. Enable the toggle for **Attack Paths Alert**.
 2. Open the **Logs** tab.
3. Enable the **Log Connection** toggle if logging is not already enabled.
2. Open the **Logs** tab.
3. Enable the **Log Connection** toggle if logging is not already enabled.
 4. Confirm in the logs that alerts are created successfully.
 5. Open the **Cases** page to review the resulting cases, alerts, and events.
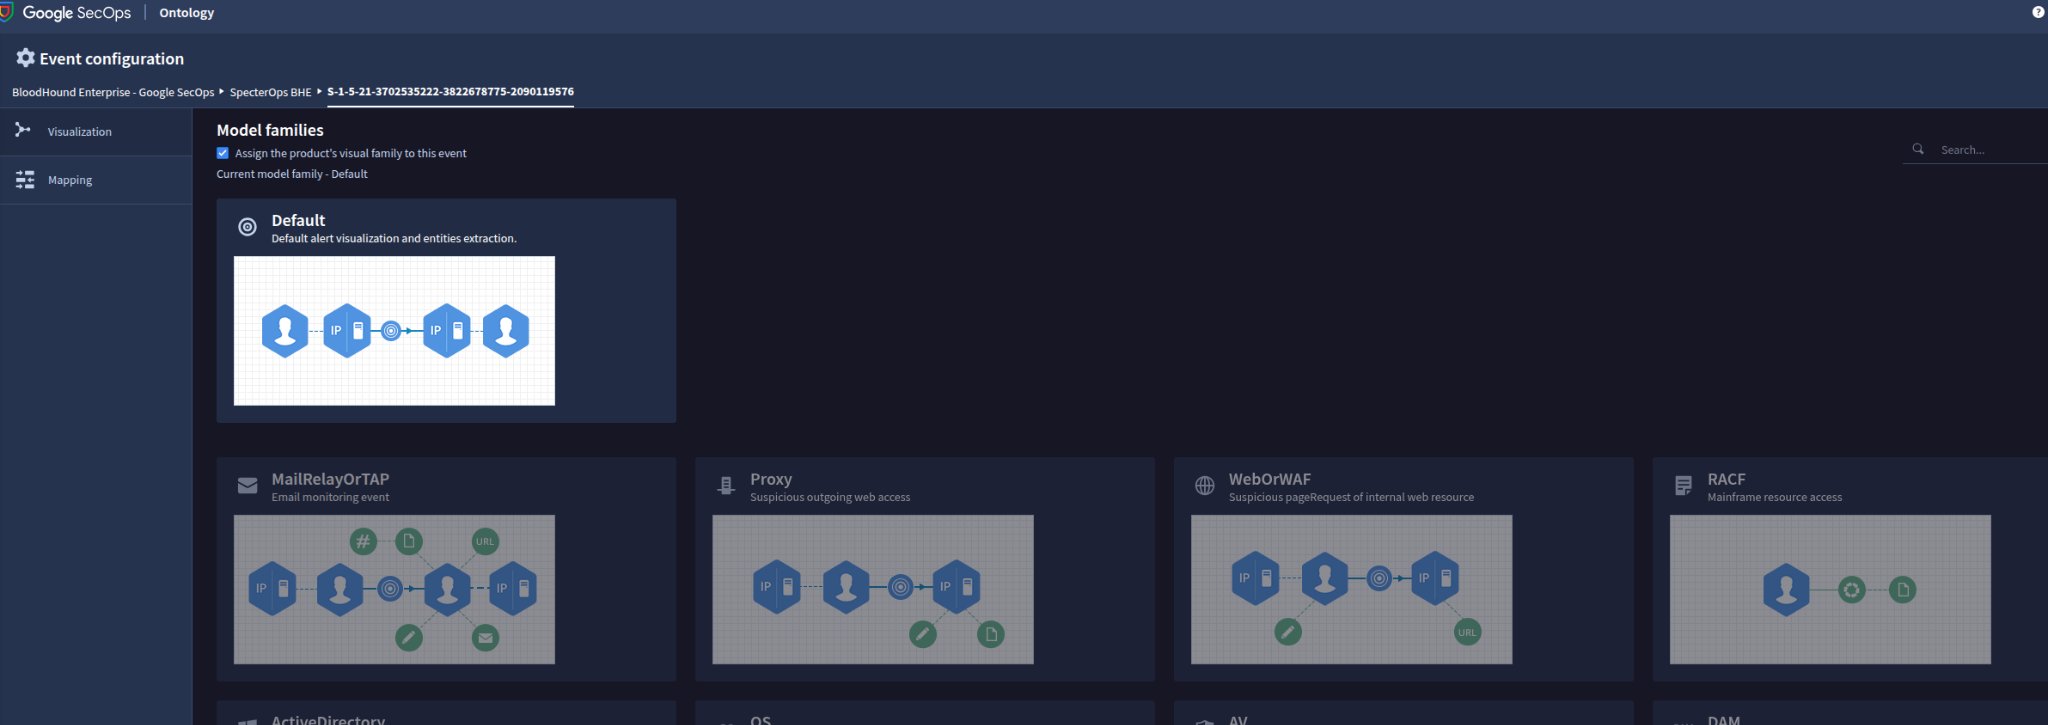
## Map and model alerts
Alerts are not mapped and modeled by default. Configure field mappings before you move the integration into regular analyst workflows.
Open the Google SecOps settings menu and select **Mapping and Modeling**.
For this example, use the **Default** family to classify alerts under a predefined set of rules.
1. Choose the **Default** family.
2. Open the **Visualization** tab.
5. Open the **Cases** page to review the resulting cases, alerts, and events.
## Map and model alerts
Alerts are not mapped and modeled by default. Configure field mappings before you move the integration into regular analyst workflows.
Open the Google SecOps settings menu and select **Mapping and Modeling**.
For this example, use the **Default** family to classify alerts under a predefined set of rules.
1. Choose the **Default** family.
2. Open the **Visualization** tab.
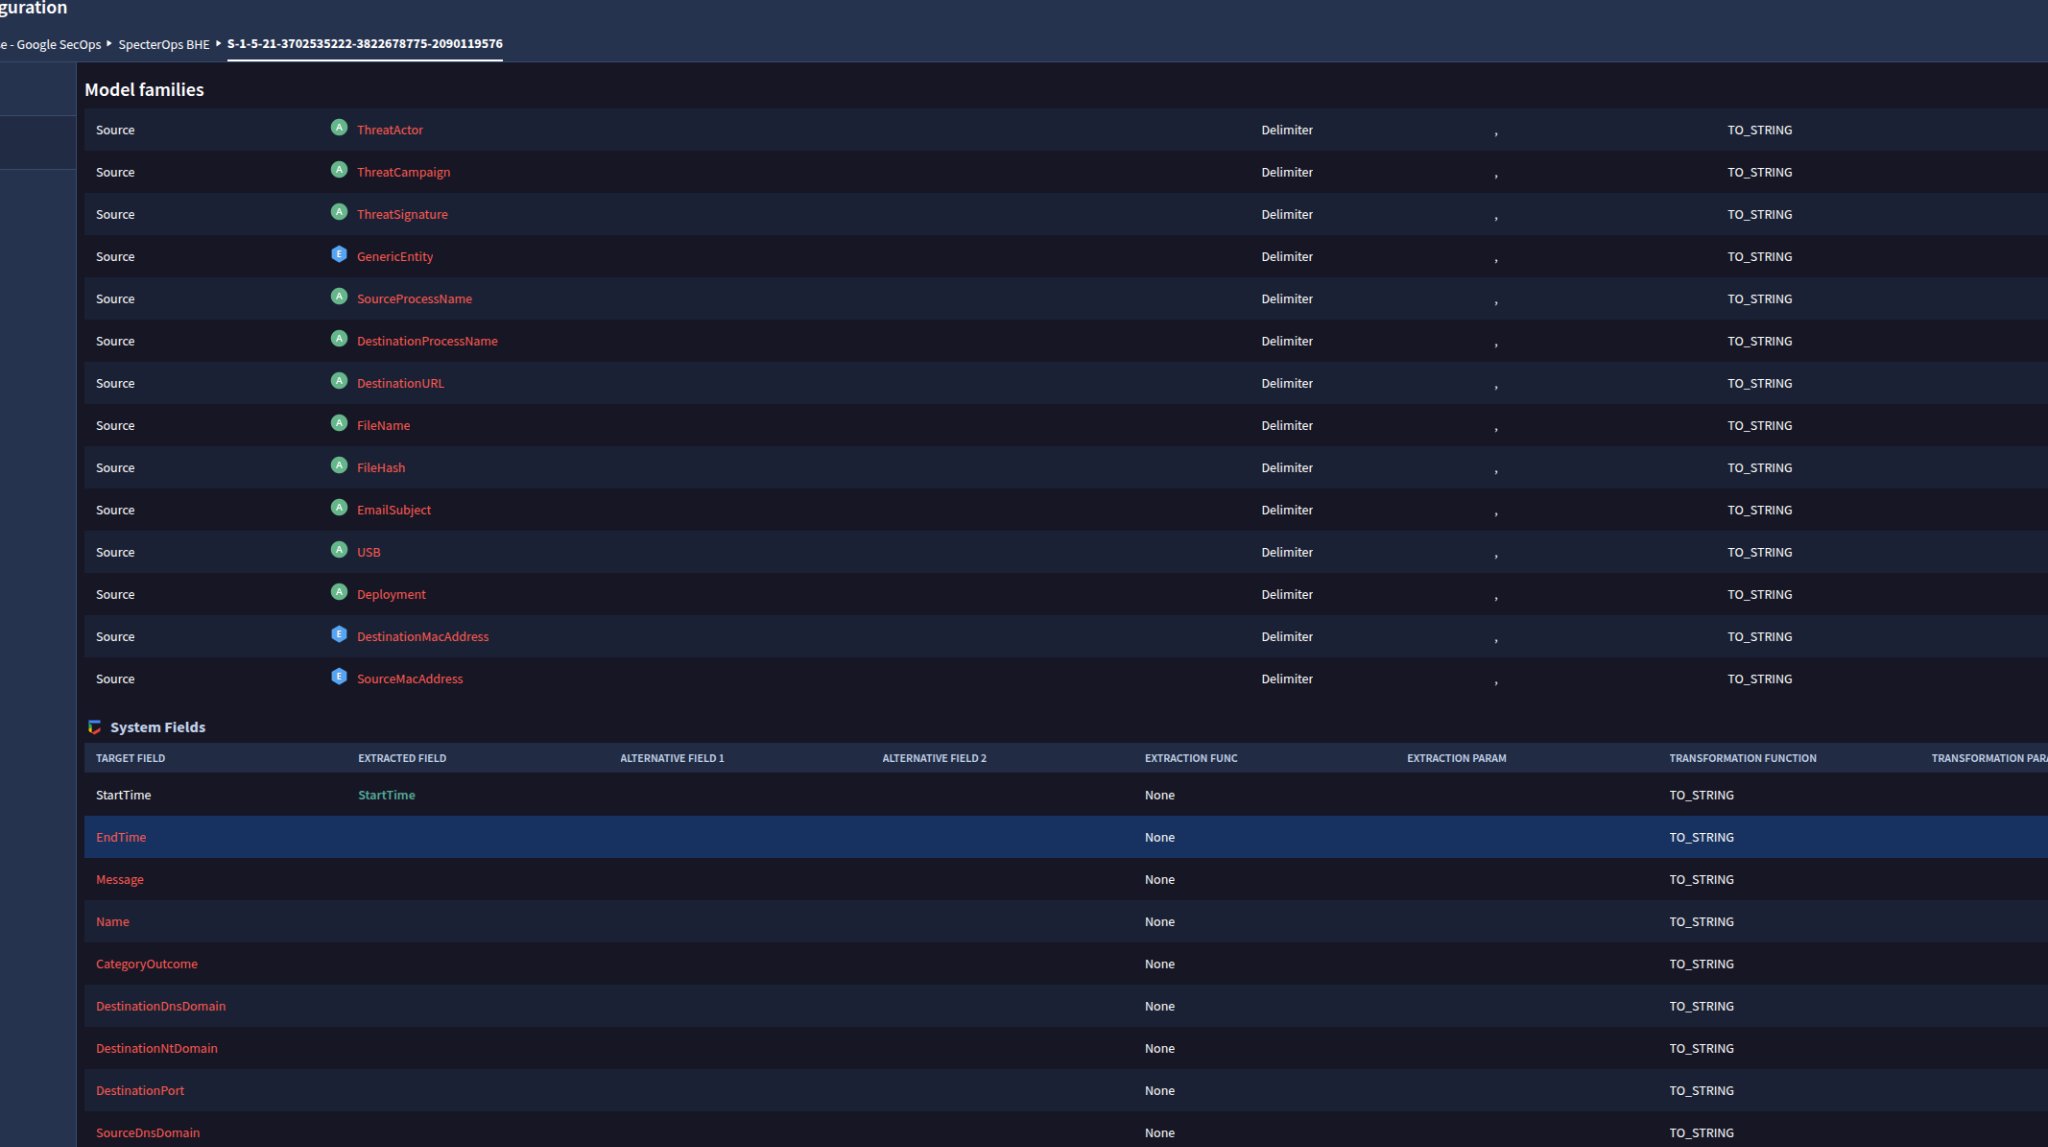
 Map the incoming alert fields to the corresponding event fields.
1. Ensure that **StartTime** and **EndTime** are configured correctly.
These fields are crucial for defining the time frame of the events.
2. Save the mapping configuration.
3. Test the mapping with sample alerts before you use it in production.
Map the incoming alert fields to the corresponding event fields.
1. Ensure that **StartTime** and **EndTime** are configured correctly.
These fields are crucial for defining the time frame of the events.
2. Save the mapping configuration.
3. Test the mapping with sample alerts before you use it in production.
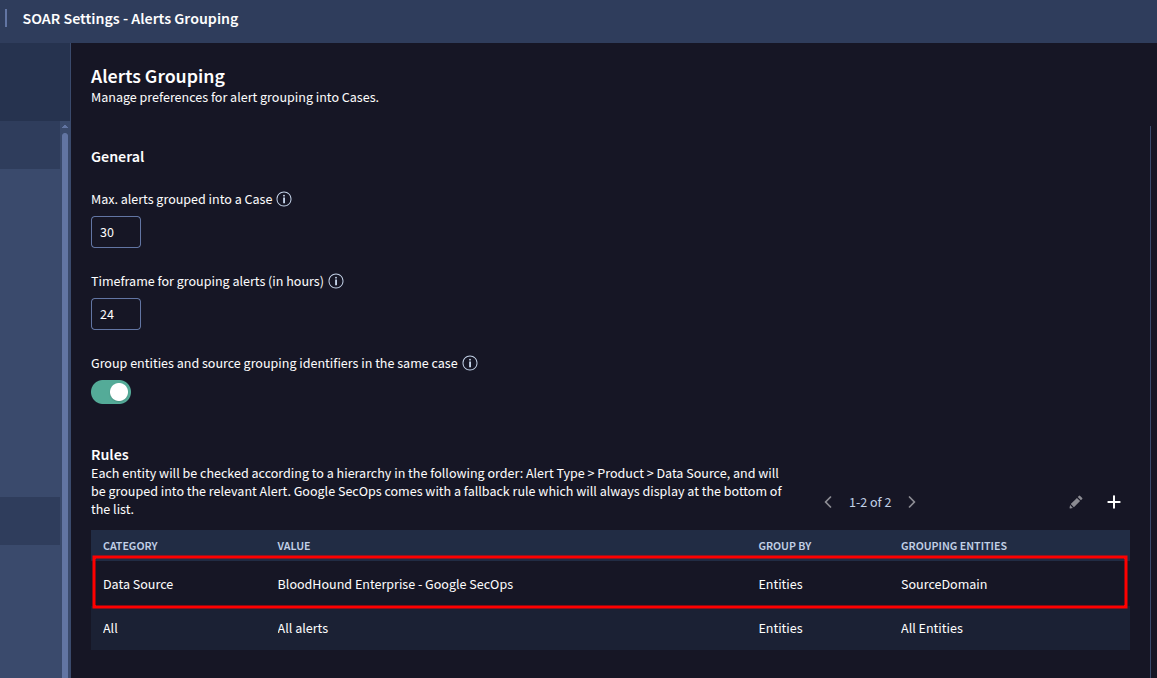
 ## Configure alert grouping
Configure alert grouping so Google SecOps groups related BloodHound Enterprise alerts into one case per source domain.
Grouping alerts from the same domain into a single case allows for:
* Easier investigation and triage
* Clear, organized case structures
* Domain-specific incident visibility
* Scalable response workflows
1. Go to **SOAR Settings** > **Advanced** > **Alert Grouping**.
2. Click **Add Rule**.
3. Configure the rule with the following values:
| Setting | Value |
| ------------------- | --------------------------------------- |
| **Category** | `Data Source` |
| **Value** | `BloodHound Enterprise - Google SecOps` |
| **Group By** | `Entities` |
| **Grouping Entity** | `SourceDomain` |
Save the rule after you enter the values.
## Configure alert grouping
Configure alert grouping so Google SecOps groups related BloodHound Enterprise alerts into one case per source domain.
Grouping alerts from the same domain into a single case allows for:
* Easier investigation and triage
* Clear, organized case structures
* Domain-specific incident visibility
* Scalable response workflows
1. Go to **SOAR Settings** > **Advanced** > **Alert Grouping**.
2. Click **Add Rule**.
3. Configure the rule with the following values:
| Setting | Value |
| ------------------- | --------------------------------------- |
| **Category** | `Data Source` |
| **Value** | `BloodHound Enterprise - Google SecOps` |
| **Group By** | `Entities` |
| **Grouping Entity** | `SourceDomain` |
Save the rule after you enter the values.
 With this rule in place, Google SecOps groups all alerts for the same source domain into a single case, up to the platform's case and event limits.
## Next steps
After the connector is running, use [cases and alerts](/integrations/google-secops/use) in Google SecOps to investigate BloodHound Enterprise findings.
For help resolving issues, see [troubleshoot common issues](/integrations/google-secops/troubleshoot).
With this rule in place, Google SecOps groups all alerts for the same source domain into a single case, up to the platform's case and event limits.
## Next steps
After the connector is running, use [cases and alerts](/integrations/google-secops/use) in Google SecOps to investigate BloodHound Enterprise findings.
For help resolving issues, see [troubleshoot common issues](/integrations/google-secops/troubleshoot).